Are you searching for a good quality tile? Haven’t you got any of them despite multiple searches? Haven’t any building materials firm offered you the best one till now? Don’t worry, Athangudi tiles are your answer.
Purpose of the Tiles :
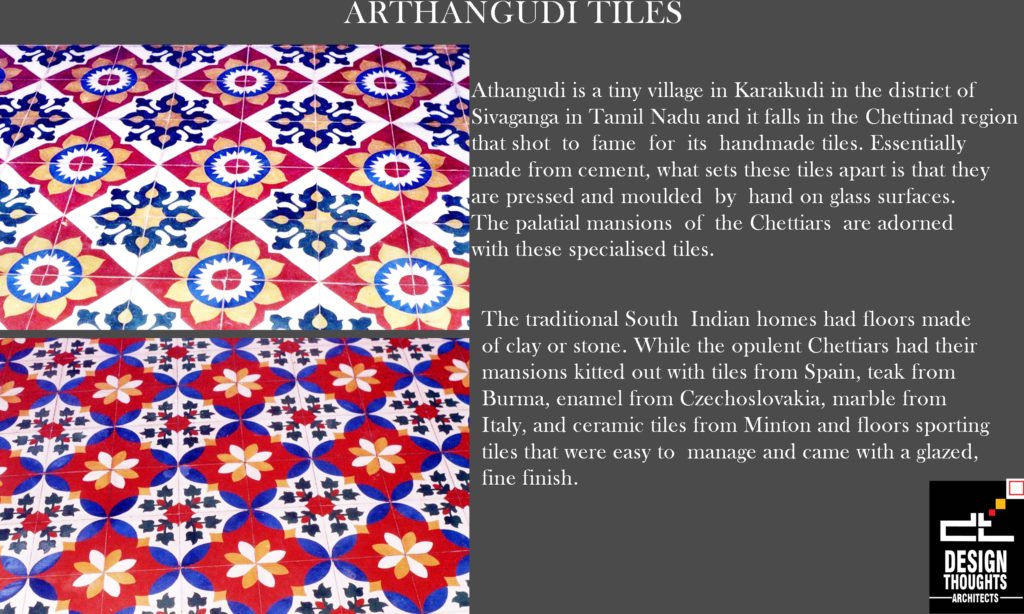
The architects always choose these tiles for residential and commercial projects. As Athangudi tiles are essentially made from cement, what sets them apart is that they are pressed and molded by hand on glass surfaces. Athangudi falls in the Chettinad region, where the palatial mansions of the Chettiars are filled with these specialized tiles.
The affluent Chettiars had their mansions kitted out with products from all over the world. Tiles from Spain, teak from Burma, enamel from Czechoslovakia, marble from Italy, and ceramic tiles from Minton. While traditional South Indian homes had floors made of clay or stone, the homes of the Chettiars were a veritable melange of cultures and products from all over the world that included floors sporting tiles that were easy to manage and came with a glazed, fine finish. Walk into Athangudi, and you will enter the world of color. Small and big homes contain with famous intricately patterned and gloriously hued tiles.

The factories are not large; most of them have a few workstations where craftsmen are hard at work using their hands to mold and craft these richly patterned tiles. What makes them so alluring even today? It’s the process and the fact that they are Eco-friendly.
The freshly finished tiles are kept immersed in water for around 8 to 12 days and dried for 24 hours to make them tightly knit and compact. At the end of this process, the tile slides away from its resident glass frame and is dried out completely by covering them with locally sourced rice husks. The natural oils in the husk are absorbed by the tiles, giving them a natural sheen and glazed finish.
Unique Quality of Athangudi Tiles

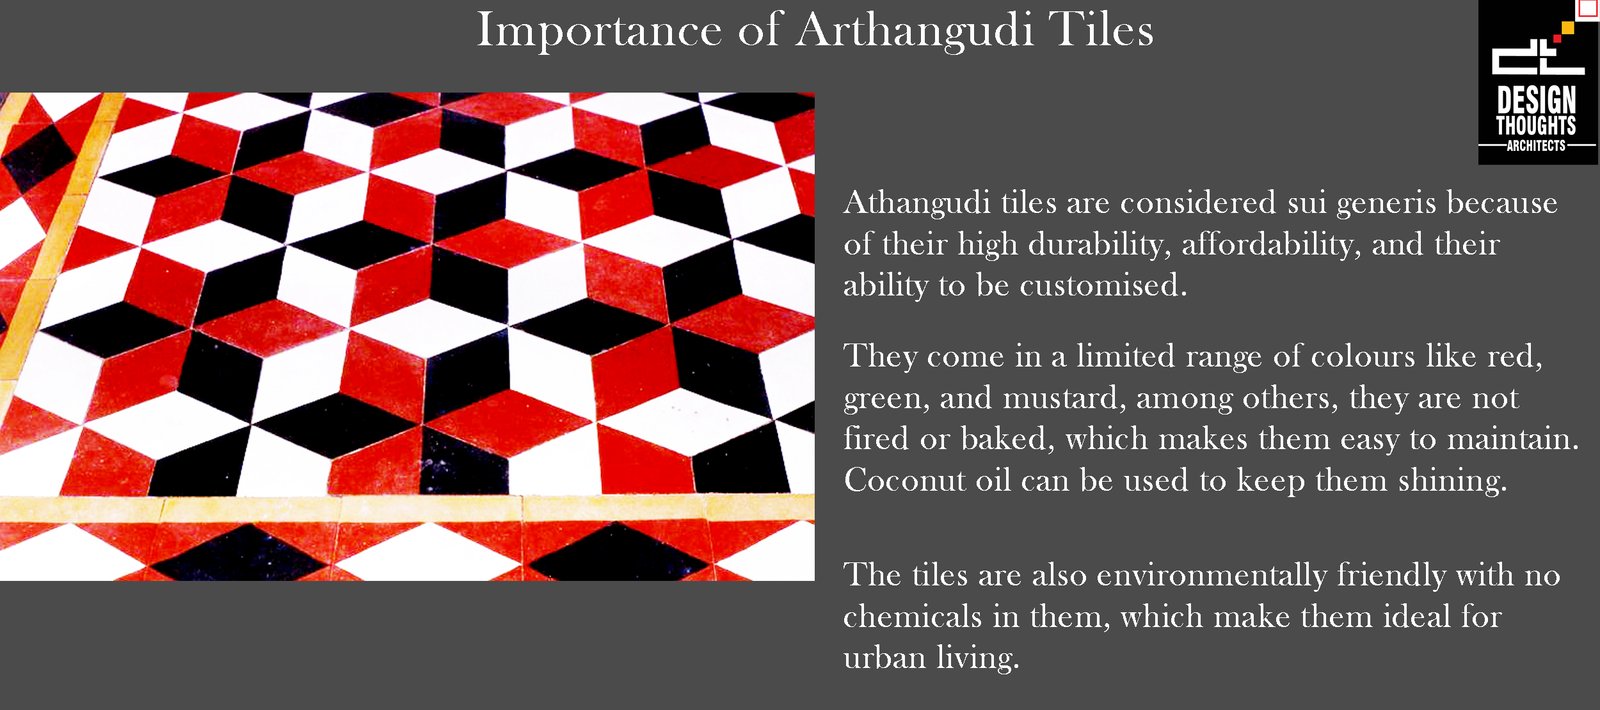
Athangudi tiles are considered sui generis because of their high durability, affordability, and their ability to be customized.
Although they come in a limited range of colors like red, green, and mustard, among others, they are not fried or baked, which makes them easy to maintain. In fact, the colors become brighter with use and additionally, coconut oil can be used to keep them shining.
The tiles are also environmentally friendly with no chemicals in them, which makes them ideal for urban living. Due to these features & Eco-friendly nature many prefer this tiles. Architects first give preference for these tiles.
Commonly Available Tile Sizes:
- Flooring (0.75 inch thick)
- 8 x 8 inches
- 10 x 10 inches
- Skirting (0.5 inch thick)
- 8 x 8 inches
- 10 x 10 inches
- Borders (0.75 inch thick)
- 10 x 5 inches
- 8 x 6 inches
- 8 x 5 inches
- 8 x 4 inches…Reference
How are the Tiles Made?
This procedure can be understood in 10 easy steps:
1. A transparent piece of glass is clasped to a clean metal frame that acts as a bounding box to achieve the required size of the tile.
2. To print the chosen pattern or motif, a stencil is placed over the glass plate within the frame.
3. The coloured mixes are pre-prepared by blending finely-sieved sand and white cement with the respective coloured oxides in water, to a thick consistency. These different coloured mixes are poured into the different sections of the stencil with ladles. Alternatively, the coloured mixes are poured onto the glass plate directly and freehand swirls or floral designs are created with sticks (in a thickness of 3-4 millimetres).
4. To keep the colours in place, a dry powder of sand and cement is spread over the mix as soon as the stencil is removed from the frame. This layer has a thickness of 3-4 millimetres.
5. Next, the tile is filled with a layer of cement mortar and compacted with a hand spade. Once set, the dry powder is spread again to achieve a dry, level surface. This layer is 10 millimetres thick.
6. The bounding metal frame is then removed, leaving the tile on the glass plate.
7. The patterned cement tiles are dried for a day before immersing them in water for the curing process.
8. It takes about 8-12 days to cure the tiles under water to the desired strength.
9. Lastly, the cured tiles are dried under the sun among husks to soak up excess moisture. The glass plate detaches itself naturally from the tile in this process.
10. A stone is rubbed gently against the edges to obtain a smooth finish, and, finally, the tiles are stacked for dispatch.
Athangudi tiles are a legend that are now being dispatched across the globe. The beautiful little masterpieces are a sustainable option for homes and would definitely make a statement wherever it is used.